Simon Paja


VOX AC15 with some modifications.
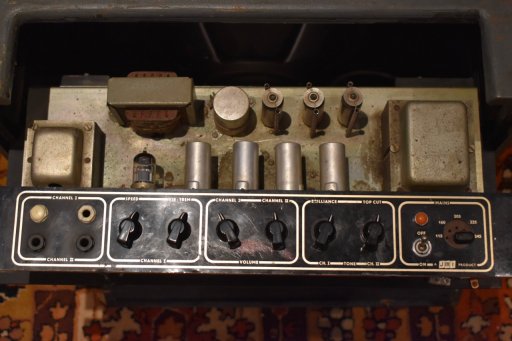
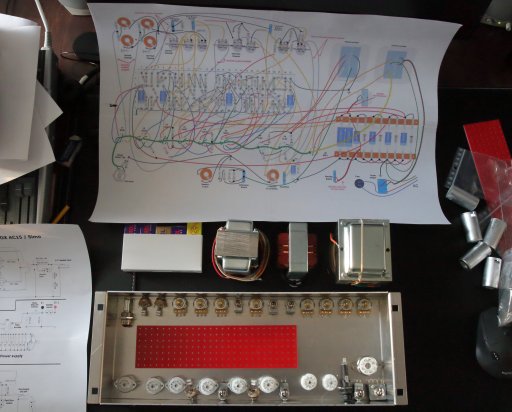
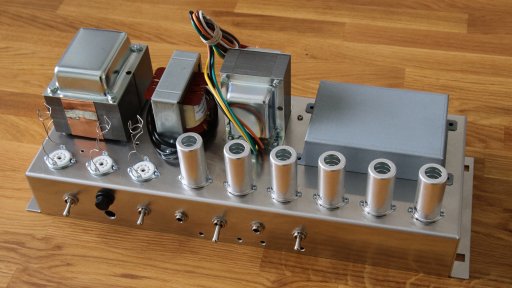
VOX AC15 from the year 1960.
Chassis out of the cabinet.
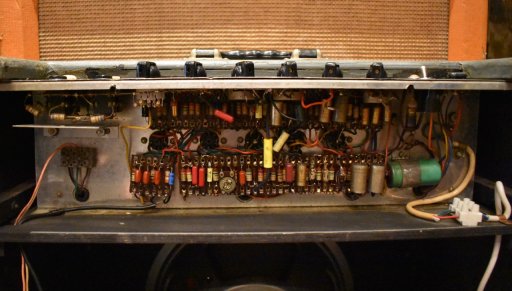
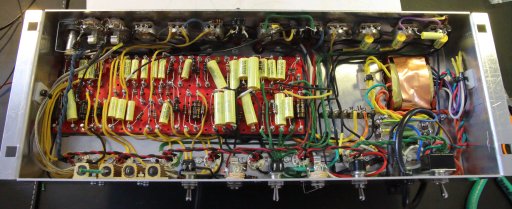
Boards inside.
Now I’m starting to make a copy of VOX AC15, from scratch.
I tried to find a nice kit to build a VOX amplifier to be played together with my Rickenbacker copy but no luck. So I started to draw the schematics myself. I made most of my working career repairing electronics. Mostly PC’s in 1980’s and 1990’s.
Some basic schematics had been released by VOX so that was the starting point. I made some modifications to those. I chose VOX AC15 schematics from 1960. Normal channel has the EF86 and the
Tremolo/Vibrato channel has 12AX7.
Some things that I modified:
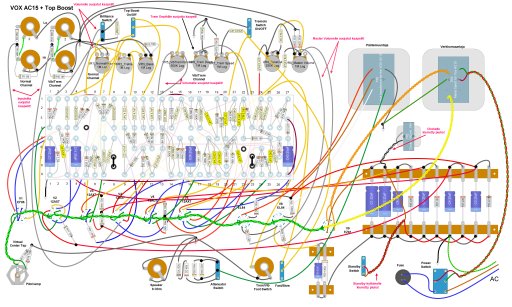
- There was no Top Boost, added it from a newer model
- made also the Top Boost available to both channels
- the original tremolo/vibrato (Vibravox) circuit had a three switchable speeds, I changed it adjustable with a pot
- added Master Volume pot
- added also switchable attenuation from 15 W to 1,5 W
I’m making the turret board from scratch.
Chassis will be a Marshall type without holes.
Now I’m starting to make a copy of VOX AC15, from scratch.
I tried to find a nice kit to build a VOX amplifier to be played together with my Rickenbacker copy but no luck. So I started to draw the schematics myself. I made most of my working career repairing electronics. Mostly PC’s in 1980’s and 1990’s.
Some basic schematics had been released by VOX so that was the starting point. I made some modifications to those. I chose VOX AC15 schematics from 1960. Normal channel has the EF86 and the
Tremolo/Vibrato channel has 12AX7.
Some things that I modified:
- There was no Top Boost, added it from a newer model
- made also the Top Boost available to both channels
- the original tremolo/vibrato (Vibravox) circuit had a three switchable speeds, I changed it adjustable with a pot
- added Master Volume pot
- added also switchable attenuation from 15 W to 1,5 W
I’m making the turret board from scratch.
Chassis will be a Marshall type without holes.
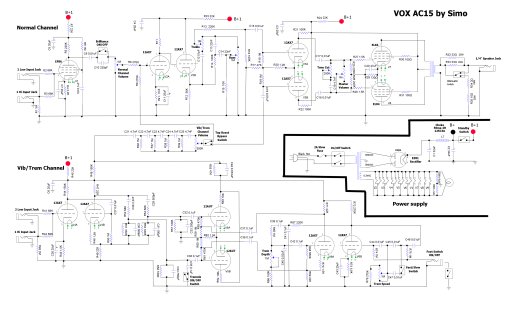
Here are the schematics and layout:
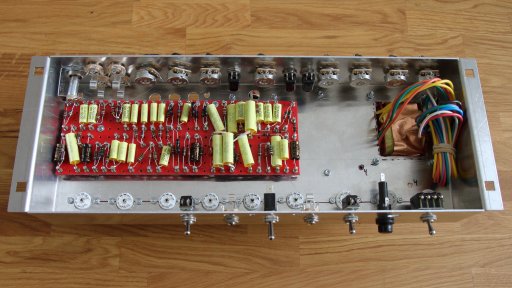
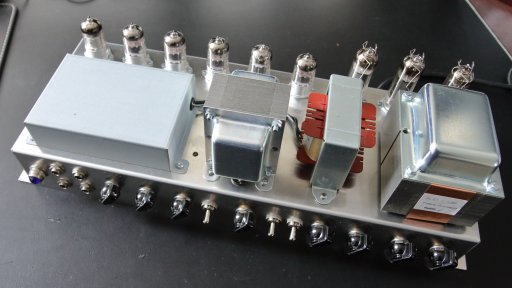
A long line of pots and switches on the front side and nine tube sockets on the back.

Some parts soldered to turret board. Since there was not enough room inside the chassis for the filter capacitors they will be located on the top in a dog house. The tremolo/vibrato circuit made the other end of the turret board quite crowded. Lots of capacitors.
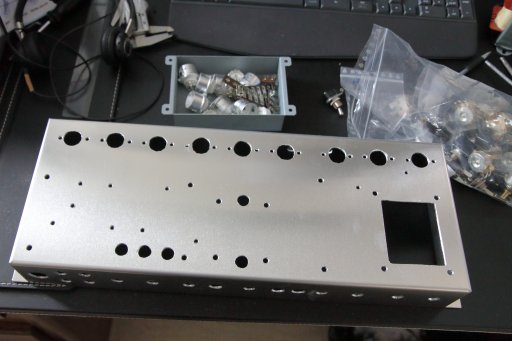
This type of chassis is perfect for this project because I’m making this as a head only. Spent just a couple of hours drilling the holes.
That’s the place for the turret board.
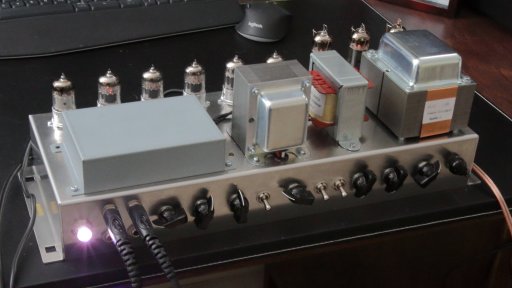
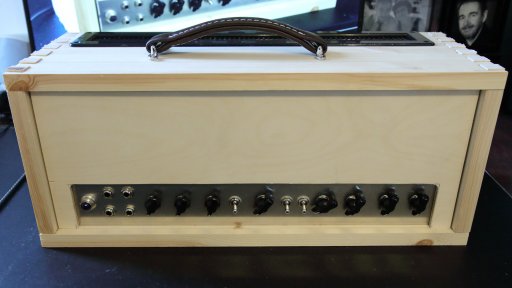
Everything that was planned to be in the front found their places easily. But not too much space between the knobs.
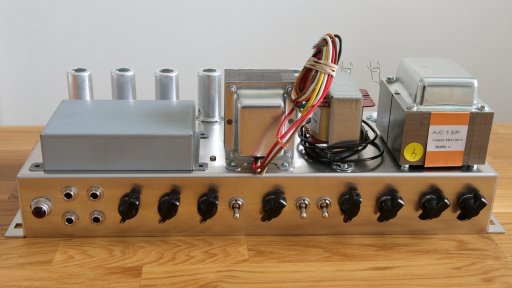
Switches, jacks and fuse holder on the back.
Wiring is almost done. Several meters of wire has gone there.
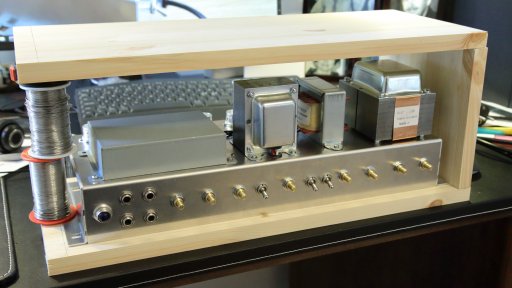
Fitting the cabinet wood. Top and bottom are in correct size already, now measuring the height of the sides. Soon starts the making of dove tail finger joints.
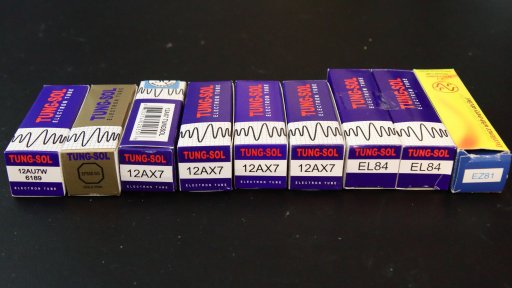
The tubes.
For the first time the tubes are on their places.
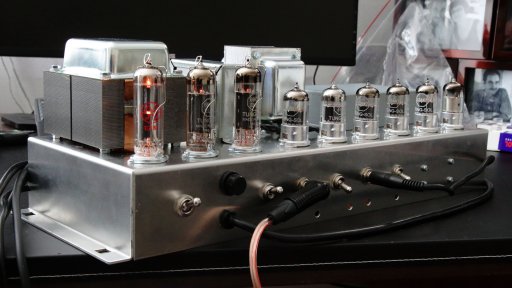
Up and running, good sound! Before this I checked with my tools that the power transformer gives all correct AC levels, then I checked that the rectifier tube works and gives correct DC values. Checked also that there is no short circuits to ground from any high voltage components. Finally all the tubes on and connecting the speaker.
Both channels ok, vibrato and tremolo working.
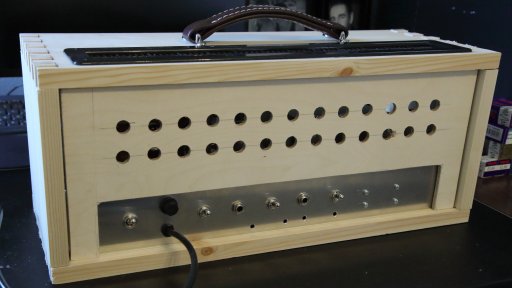
Finger joints have been done, front and back panel done. I made some holes to back to help cool air to get inside, the vent grill is right above the tubes. The vent is a Marshall model. It was easier to make one big hole for a vent grill that uses screws than to make three smaller holes for the VOX grill which does not use screws. Some holes also on the bottom.
First gluing all together then planning the final looks, tolex, paint?
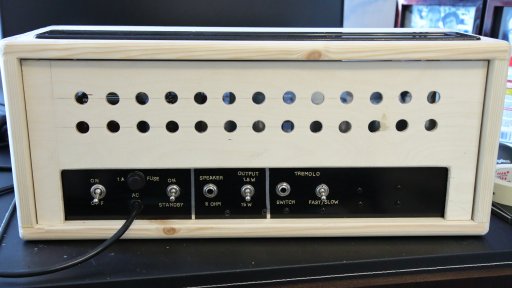
Black lacquer on the chassis and the text over that. Back side.
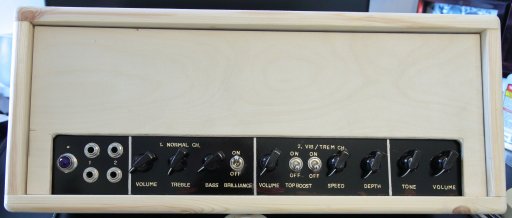
And the front side.
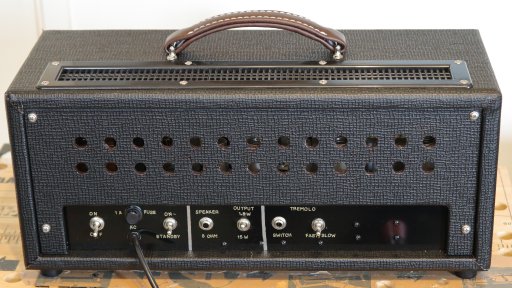
Tolex on the back an air ventilation for the tubes on the top.
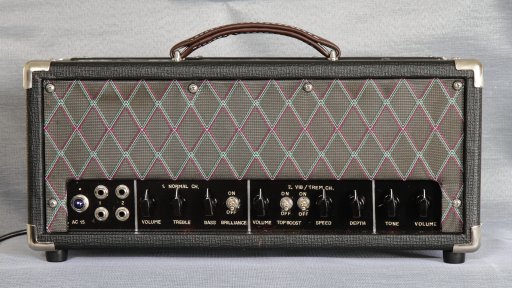
VOX type of cloth on the front. Corner protectors also on their places.

Cabinet is almost ready. 2x10” Celestion Greenbacks have been ordered.


